11 feb. 2016
Autolyse method - Pizza Dough
When I first started this blog I wanted to bring something new and not just a few recipes. So I discovered, in my daily research, the autolyse method, cutting edge technique to improve your dough quality. This method was developed and carefully studied by the french Pastry Chef Raymond Calvel.
He teaches us to mix flour and water, leave it for 15 to 20 minutes and then add the yeast and salt, except for the dried yeast wich requires more time to hydrate and so it's not interfering with the autolyse process.
Salt and fresh yeast counteracts with the autolyse effect by making the gluten bonds harder and tighter.
The benefits of the autolyse method are:
- the flour is more hydrated, wich helps in achieving stronger gluten bonds,
-the action of an enzyme named proteases, present in flour, will help you get a more pliable dough,
-kneading time is considerably reduced.
But enough with the chemistry lesson, we will talk more along the way.
Ingredients:
1000 g all purpose flour (or a mixture of all purpose and bread flour)
670 g (~710 ml) luke warm water
40 g (~60 ml) olive oil
5 g dried yeast
20 g salt
Weigh in the flour in a large bowl and make a well in the center. Pour the water, oil and yeast in there, and mix slightly with your hands for 2-3 minutes until you end up with a dough that it hasn't come together yet, but the flour is fully mixed in.
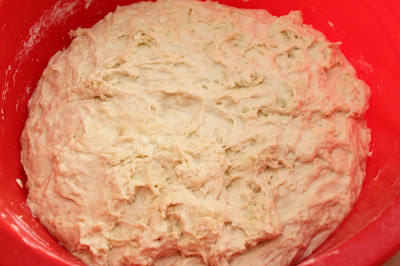
Leave this dough to rest for 15-20 minutes. Now is the time of the autolyse process, when the flour hydrates and the enzymes have started their action. After the time has run out you should be able to see a difference in the dough's texture. It becomes soft, pliable and you don't have to knead for too long. It took me about 20 minutes of kneading for 1 kilo of flour, piece of cake, right?!
Add the salt (and yeast if you're using fresh) making sure you sprinkle it all over the surface of the dough for better distribution. From here on, the final step begins. We knead by hand for ~20 minutes, or 10 minutes with a stand in mixer (with the dough hook attachament).
In my opinion the best kneading technique is "roll, press and fold". Your dough is ready when a piece of dough can be stretched enough to see the light through without tearing.
Oil your bowl an the top of your dough, cover with a clean kitchen towel (or plastic wrap) and let it rise at room temperature (21-22 C degrees) for 1-2 h minimum. I let it rise for 6 h and it was amazing, full of bubbles and fluffy. You can also freeze the dough at this point and when you want to make pizza from scratch in no time, let it thaw and you're good to go. I didn't get a chance to take a picture with my homemade pizza, but I promise I'll do an update.
Please don't be scared to take the time to do this because it's very easy and I believe no one can't mess this up. It takes a bit of time to let it rise, because of the small amount of yeast, but the final flavor is much better, because we didn't rush the dough. So make it once, and freeze for later, you won't regret it!

 English
 Romana


